Working at the top of a tanker or rail car comes with real risk. Every step, reach, and connection happens above ground level, often with limited room to move. That makes equipment design a safety decision, not just an operational one.
A top loading arm plays a direct role in that safety picture. Its reach, weight, and control affect how a worker positions their body during product transfer. However, the way it’s designed can make or break its ability to keep workers steady and supported as they work.
This article breaks down the ways that loading arm design shapes worker safety at height.
Reach and Sizing Reduce Overextension Risk
Overextension is one of the most common risks during product transfer. Workers reach, twist, or lean to connect a hose or arm to a hatch. A well-designed top loading arm removes much of that need.
That's where design comes in. Reach and sizing do most of the work to keep workers in a safe, natural position.
Design features that reduce overextension include:
- Horizontal reach. A good arm reaches every compartment on the vehicle without requiring it to be repositioned mid-operation.
- Adjustable vertical movement. The arm should extend and retract smoothly across the full range of tanker and rail car heights at the site.
- Flexible drop-pipe length. The drop pipe should reach the bottom of the compartment being filled, regardless of its depth.
- Correct sizing. The arm's diameter should match the product and flow rate, so it's not too bulky or too light to control.
When reach and sizing are matched to the actual operation, workers move less and stay in a more stable position. That reduces the chance of a slip or fall at the connection point.
Loading Arms Limit Manual Handling
Manual handling is another major contributor to injury during product transfer. Dragging hoses, lifting fittings, and forcing stiff connections all add physical strain. Loading arms are designed to remove much of that burden.
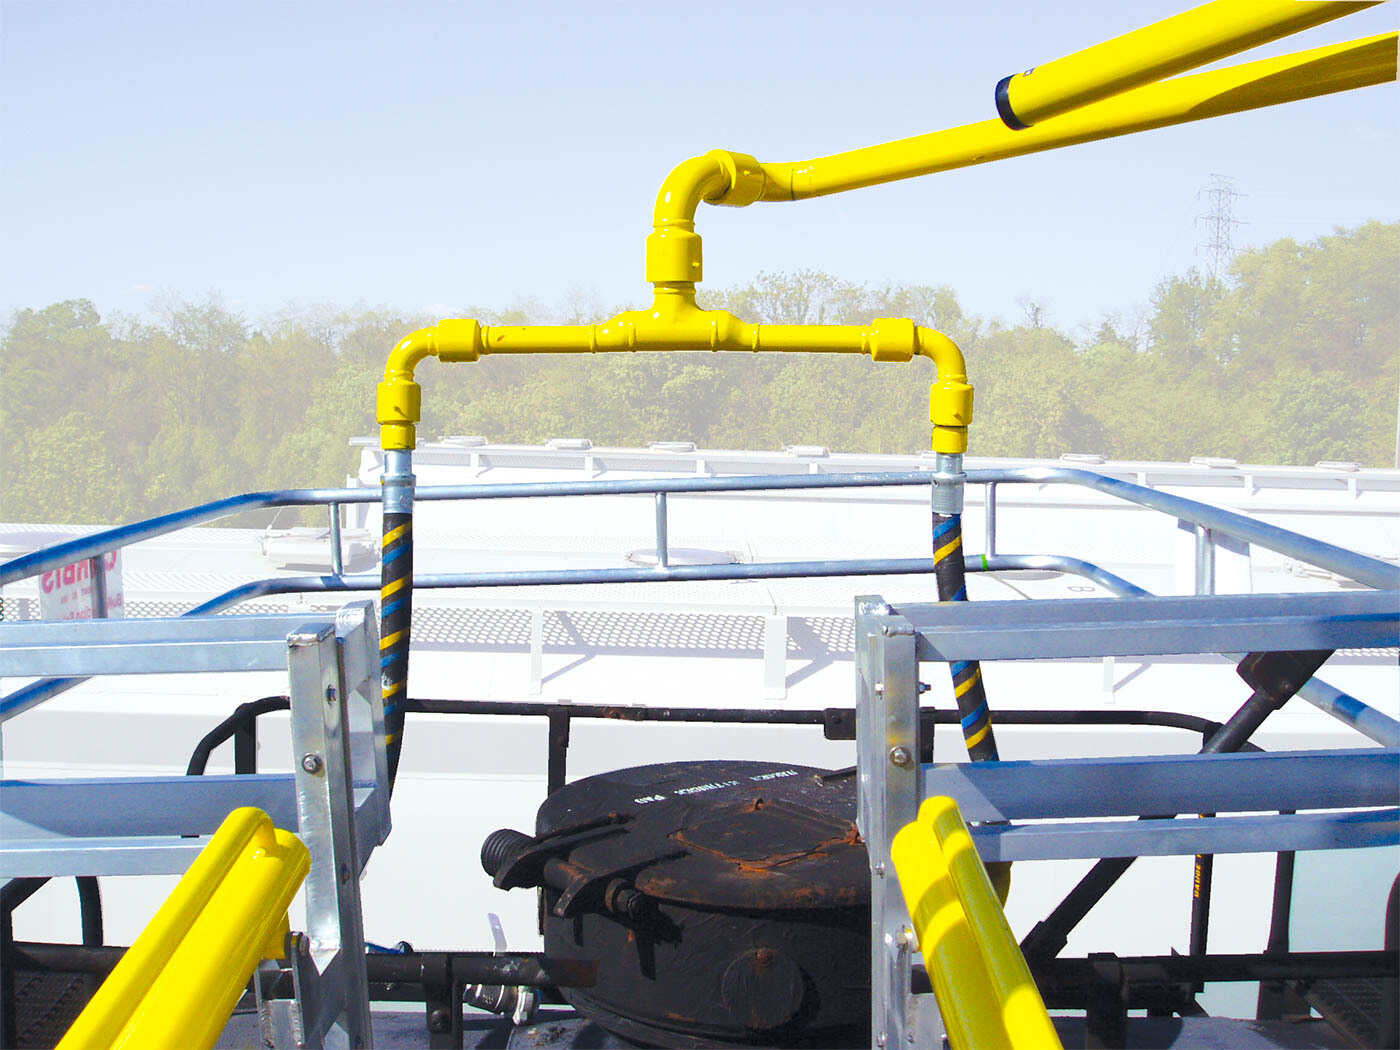
Unlike hoses, loading arms are counterbalanced and mounted in place. Workers guide the arm into position instead of lifting or dragging heavy equipment across a platform. This reduces the physical effort required for each connection, and lowers the risk of strain injuries over time.
Among the ways that a well-balanced loading arm design limits manual handling are as follows:
- Fixed mounting. A fixed arm stays anchored to the platform, removing the need to carry or reposition heavy equipment.
- Simplified connection steps. A well-designed arm should require fewer manual steps to complete a secure connection.
- Single-worker operation. A well-balanced arm should be operable by one person, without needing a second worker to help maneuver it.
- Ergonomic handles. These should let workers guide the arm into place with a firm, comfortable grip, instead of straining to hold or force it.
Less manual handling means fewer opportunities for strain, dropped equipment, or an off-balance movement at height. That makes the connection process safer from start to finish.
Counterbalance and Control Design Reduce Physical Strain
Physical strain builds up fast during repeated actions. Guiding, holding, and adjusting equipment by hand puts steady stress on the back, shoulders, and arms. Over time, that stress adds up.
In fact, manual materials handling is the leading source of compensable injuries in the American workforce, according to OSHA's Technical Manual. At height, strain-related slips or momentary loss of control carry higher stakes than they do at ground level.
This is where the counterbalance and control features of a top loading arm proves important. These reduce this physical strain and ensures fall protection using the following components:
- Spring-assisted counterbalance. A good system offsets the arm's weight, so workers apply light, steady pressure instead of fighting the arm's full weight.
- Smooth swivel joints. These should move freely through the full range of motion, without sticking points that require a sudden burst of force.
- Balanced pivot points. The arm should hold its position once placed, so workers don't need to brace or support it while making the connection.
- Adjustable resistance. Some systems let workers fine-tune the arm's resistance, so it can be matched to the product weight and connection type.
When an arm is well-balanced and easy to control, workers use less physical effort per connection. That lowers fatigue and reduces the chance of a strain injury or a sudden loss of balance at height.
Top Loading Arm Systems Reduce Time Spent at Height
Every extra minute at height adds exposure to risk. Fumbling with a stiff connection, repositioning equipment, or troubleshooting a poor fit all extend the time a worker spends on top of a tanker or rail car. Falls remain one of the leading risks in loading and unloading operations, and exposure time is a major factor in that risk.

Among the top loading arm design factors that reduce time spent at height are:
- Fast, secure connections. A good arm should connect on the first attempt, without requiring repeated adjustments or repositioning.
- Minimal setup steps. A ready-to-use arm should require little to no adjustment before each connection.
- Reliable seals and fittings. These should hold consistently, so workers don't need to double-check or re-secure the connection before starting transfer.
- Purpose-built configuration. An arm designed for the specific product and vehicle type should require little to no on-the-spot troubleshooting.
When a loading arm performs consistently, workers spend less time exposed to fall risk. That makes speed and safety the same goal, not competing priorities.
Integration With Access Equipment Closes the Safety Gap
A top loading arm doesn't work alone. It connects to a system that includes gangways, safety cages, and platforms. If the arm and the access equipment aren't designed together, gaps can form between what protects a worker and what the worker actually has to reach.
This matters most with chemical top loading arms, where precise connections and hazardous product handling leave little room for error. When the arm and access equipment are engineered as one system, workers stay within the intended safe zone throughout the entire connection process.
Signs of strong integration between loading arms and access equipment include:
- Coordinated reach. The arm's range should align with the cage or platform's boundaries, so workers never have to lean past the edge of the protected area.
- Matched height and positioning. The platform should be built around where the arm actually meets the tanker or rail car, not positioned as an afterthought.
- Shared design process. The arm and access equipment should come from a single engineering plan, so the two systems account for each other from the start.
- Consistent access across configurations. The setup should work reliably across different vehicle types and sizes, not just a single best-case scenario.
When loading arm design and access equipment are planned together, there's no gap for a worker to fall through, literally or procedurally. That's what makes the full system safer than any single component on its own.
Talk to Us About Your Loading Arm Setup
Top loading arm design isn't just about equipment performance. It's about how workers move, reach, and stay protected every time they're at height. Reach, sizing, manual handling, control, and integration all play a part in that outcome.
Getting these details right takes more than picking a product off a spec sheet. It takes a partner who understands your site, your product, and how your team actually works.
Carbis Solutions designs loading arms alongside the access equipment that supports them. That means your team gets a system built around your operation, not a collection of separate parts. Get in touch with our team about your loading arm setup and see how the right design can protect your workers at every connection.